HAIR ACCESSORIES – Barettes

Hey everyone,

Howdy do? Long time no see….Well it may seem that way on my blog but I have been crafting all these months mostly for craft fairs hence, never found the time to upload some of the pics. For today though I am here to share with you another of Papertrey Ink‘s awesome stitched dies – Clever Barrettes. I made lots of these cuties with felt and buttons and they were a real hit at the craft fairs.

Erin Lincoln – the brainchild of this awesome die set has a video demoing how to use them. You might want to check out some of her other amazing stitched dies as well…

Here’s my take…

P1010473And some more…

P1010475

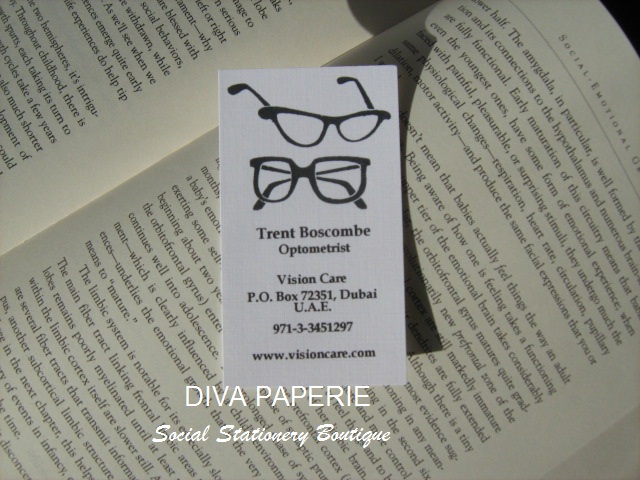
Whilst we are on the topic of Papertrey Ink, I also made some magnetic bookmarks using Papertrey Ink’s stamp set – Doodlie Do…coloured them in with copics and my fave white uni signo gel pen and stamped them on Kraft cardstock. Oh and the sentiment stamps were from Verve stamps – their Faith category.

P1010480

Till next time…

Cheers.

CUTE CHIPBOARD MAGNETS

Hey everyone,

This is my second post for today. Awhile ago my colleague requested me to make mementos for her students..something to remember her by. So after much thought and endless hours on pinterest, I decided to make them chipboard magnets.

I used the Sunny Doodles – Be Yourself and Sweet Little Memories stamp sets from My Favorite Things, stamped them with Memento Tuxedo Ink  on Desert Storm Neenah cardstock from Simon Says Stamp as I coloured the stamped images using copics. To add some dimension I used the Signo White gel pen and added a few cute digital stamps from Meljen Designs. This site has the cutest digital stamps/images you can buy!

The digital images I printed out and coloured with copics and then mounted them onto the chipboard with foam adhesives. Finally, I added a magnet on the back and sealed them in self-adhesive clear bags.

 Image


Image


Cheers!

MERRY CHRISTMAS

Hey everyone,

Merry Christmas! Well, actually I am posting this just into 2014 but wanted to share my holiday card for family and friends this year. I am very taken with the new embossing paste by Wendy Vecchi which is taking the crafting world by storm and so wanted to give it a try. For the rest of the card I used the new holiday stamp set from Papertrey Ink – Stained Glass and embossed it with Ranger’s black embossing powder on vellum card stock. I coloured the image with copics and added a little glitter on the star. Then die cut it with the matching die set and using the border frame die mounted a gold frame around it.

Oh! For the embossing paste I used the new Ring Cluster stencil by Simon Says Stamp and while scrapping the paste with a piece of cardstock created a woodgrain effect!

The sentiments both on the outside and inside the card are from the same stamp set.

Loved how the card turned out…

Image

Cheers!

FELT FLOWER FRENZY

Hey everyone,

In continuing with the craft fair goodies, I made these cute felt flowers with button embellies to be used as embellishments, on caps, hairbands, barrettes, as brooches and anything you can think of.

Here are the varieties I made.

First up – Tangerine Sunrise:

Image

The Patriots:

Image

Strawberry Cheesecake

Image

Halloween Delights

Image

Fruity Zest

Image

Colour Riot

Image

Summer Scorchers

Image

Lilacs:

Image

Watermelon Wonder:

Image

Pink Ballet

Image

Plumptious Plums

Image

All together:

Image


Cheers.

CRAFTFAIR GOODIES – MINI NOTEPADS

Hey everyone,

Over the past few years I’ve enjoyed watching projects made with the Zutter and that’s been on my wishlist ever since. Finally, a few months ago, I took the plunge and got one for myself. 

The first things I made with it were these cute mini notepads from kraft chipboard and plain computer paper which I cut and punched holes in them. I figured to add some colour I’d use Post its. I embellished the front cover with pattern paper and some circle punches.

Have a look…

Image

Cheers.

EMBELLISHMENTS…

Hey everyone,

Am back today to share you an important element on a card or scrapbook layout – Embellishments. Whilst there is a sea of them out there on the market, it’s always fun to make your own especially since they can be customized to suit your project. 

I used some dies I have as well as chipboard, cardstock, pattern paper, felt, buttons, fabric and created these simple embellishments.

First up are the apples I created – red and green:

Image

Image

With cardstock and felt I created these cute flags and mounted them on paperclips to be used as just that!

Image

I love these Potty people paperclips I made with chipboard and fabric paper:

Image

My fave of all are these speech bubbles. I made my own sentences and then printed them out on ledger paper and cut accordingly:

Image

Image

Twitter icons! Well…almost:

Image

Finally chalkboard embellies:

Image

Cheers.


PERSONALIZED STATIONERY

Hey everyone,

From the time I can recall I have loved personalized stationery and have treated myself to a variety of styles and designs. Once I discovered the versatility of stamps and dies, I attempted to create my own stationery – mostly notecards and bookplates being my favourites.

For today I have tried to recreate something similar with my stamps and dies from Papertrey Ink. For the background I used the build-a-border stamp from the Rosie Posie stamp set and die cut the alphas from their lowercase aplha dies. With my 1 3/4″ circle punch I punched out different coloured cardstock and then finished off with a stitched border using my white gel pen. Mounted the circles on foam adhesive and voila…

Image

All the four cards in the set…

Image


Image


Cheers.

FLORAL FLOURISH CASED…

Hey everyone,

A couple of days ago I saw Jennifer Mcguire’s card where she incorporated a new technique – diecut and stamping the image onto the card. I have cased that today with my own twist and the stamps and dies I have.

Instead of stamping the flower image, I diecut the card and then mounted the diecuts onto the negative space. For my flowers I used Papertrey Ink’s Notched Flowers Die and the leaves were from a set of Shapeabilities Foliage Leaves set by Spellbinders. The flowers were diecut from designer paper I had in my stash while the leaves were diecut from Papertrey Ink’s cardstock in Simply Chartreuse. I used the white signo gel pen and my green copic for some added dimension.

The background was stamped with the border stamp from the Bonjour set by Avery Elle in Hero Arts Shadow Ink in Soft Sand. The sentiment is from Verve Stamps – Faith collection and stamped with Stampin Up‘s Soft Suede ink. I finished off with a cute polka dotted button in sunshine yellow.

Image

When you open the card…

Image

A peek inside the card…

Image

Cheers.

Cutesies and warning…PHOTO HEAVY POST!!!

Hey everyone,

It was around this time last year that I started my mini business venture – Diva Paperie – selling personalized stationery. I designed and created mostly calling cards, gift tags, mommy cards and bookplates for kids. Am sharing some of those with you…mind you…this is a lengthy pics post!

Image


Image


Image


Image


Image


Image


Image


Image


Image


Image


Image


Image


Image


Image


Image


Image


Image


Image


Cheers.